
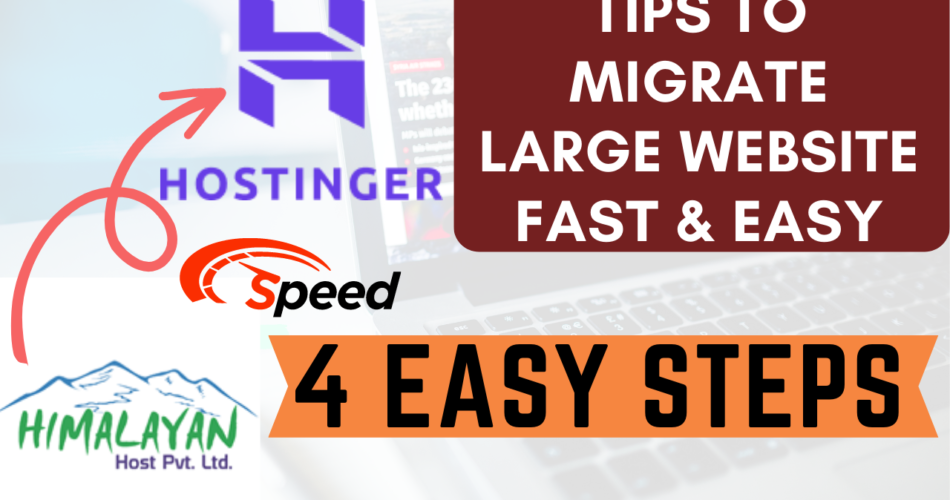
In this blog, we will learn migrating a website from one host to another perfectly, and in an easy way. I have included the steps to transfer my website from Himalayan Host (Old Host) to Hostinger (New Host).
If you have a WordPress website, you can use free plugins like UpdraftPlus, and All-in-One WP migration to migrate easily from one host to another. However, you may experience various issues if your website size is higher.
So, the technique we learn today will let you migrate any kind of website easily. Without further ado, let’s get started.
Table of Contents
How to migrate a website from one server to another perfectly?
The process we are going to discuss will be completed in 4 straightforward steps.
#Step 1: It includes downloading files, and databases from the existing host.
#Step 2: We will set up a new hosting plan on Hostinger.
#Step 3: The third step will be transferring files, and databases to the new host.
#Step 4: In the last step, we will change the domain nameservers to the new host.
Let’s explore all the steps in detail.
Step 1: Download Website Files, and Database
First of all, login to the existing host, and access the Cpanel section. Once you’re there, you can find File Manager where all your website files are stored. Select all the files, and folders inside public_html, and then compress them to create a single zip file.
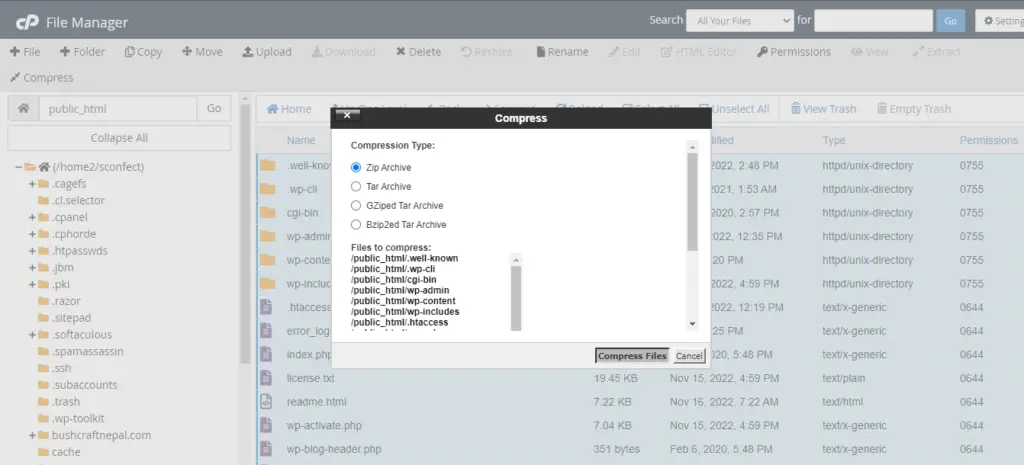
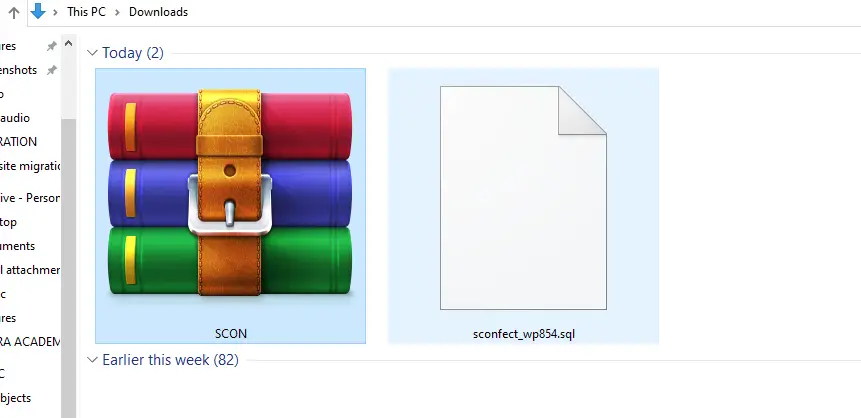
If your website files are too large, it may take some time so, be patient. Once the files are compressed, download the zip file to your computer.
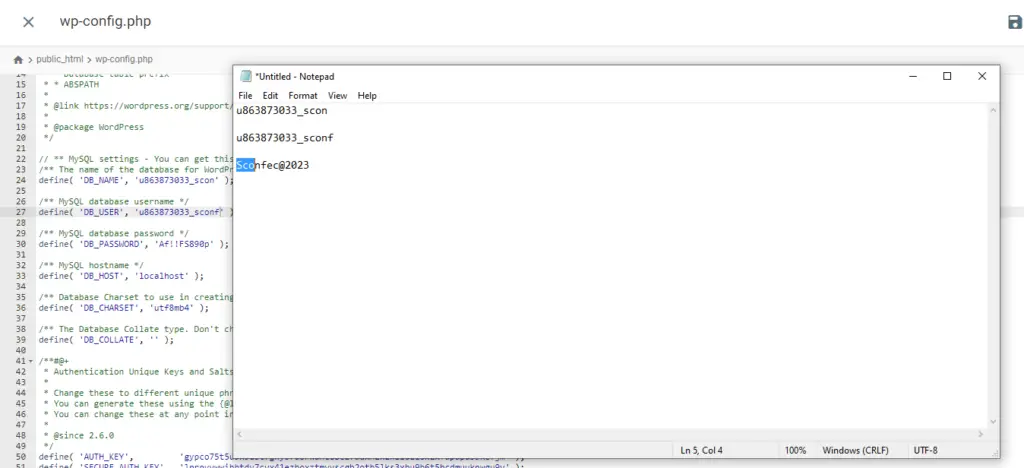
Now it’s time to download the database file. If you’re confused about which database to download, just access the wp-config file in the File Manager, and search for the database name.
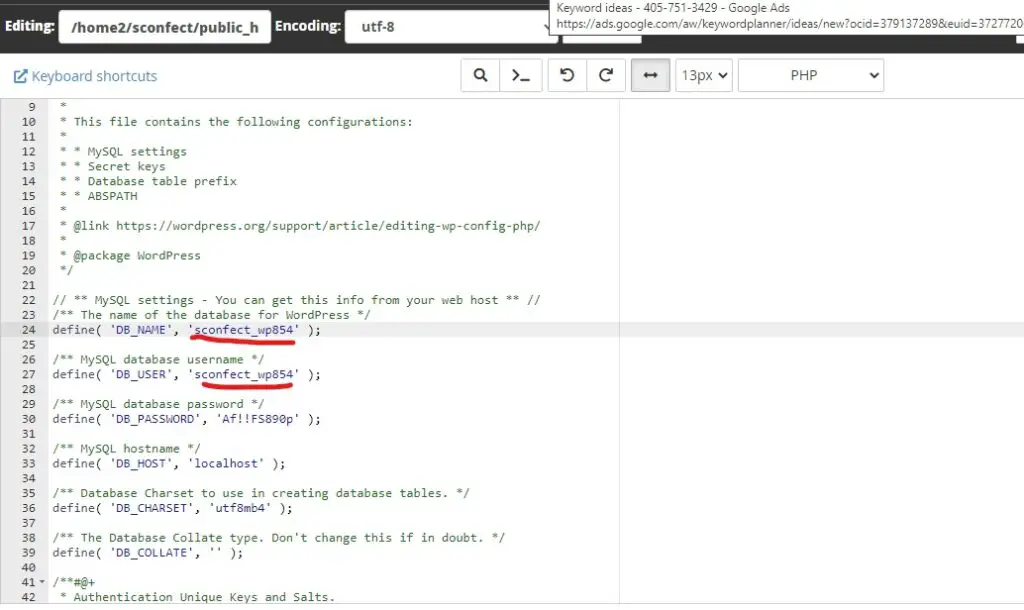
As you see in this screenshot, the database of my website is sconfect_wp854. As you find your database name, you can access the phpMyAdmin section on the Cpanel where the list of databases is displayed.
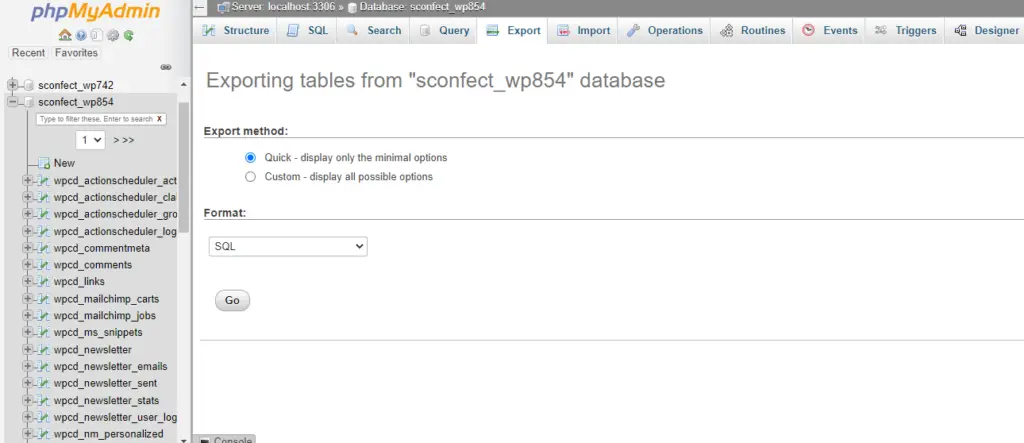
You need to download the correct database file by selecting the Export tab, and clicking the ‘Go’ button. With this, Step 1 is completed, and you have two files downloaded: ZIP File, and the Database File.
Step 2: Setup your website on the new host.
In Step 2, we will set up our website on the new host. For me, it is Hostinger.
By the way, Hostinger is one of the best web hosting companies that offer amazing performance at a reasonable price. You can join now and enjoy up to 75% discount on hosting with a free domain, and lots of other premium features.
Read my full review on Hostinger Premium Shared Hosting Plan
If you purchase a Hostinger plan using my referral link, you receive an additional 20% discount. So, what are you waiting for? Grab the awesome deal now!
Let’s get back to the migration process!
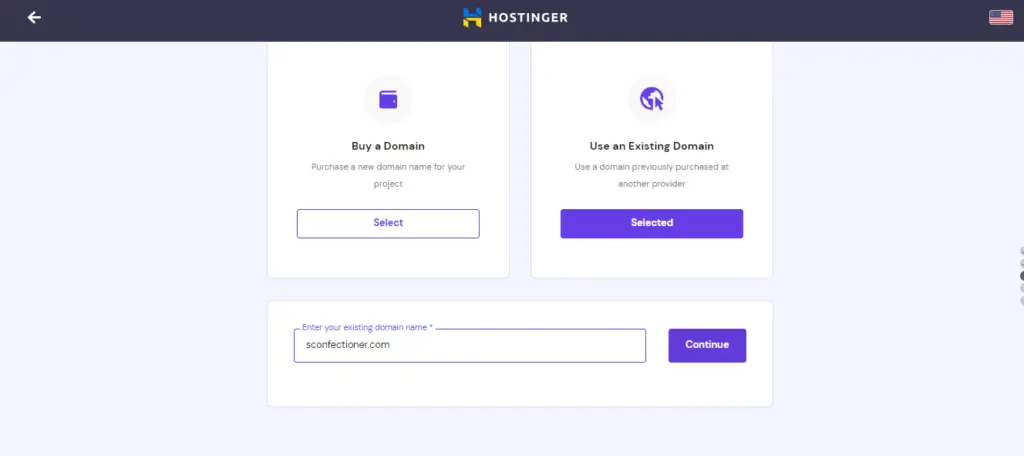
Login to the new Host, and add your website by selecting ‘Create an empty website’. You are required to enter your existing domain, and once you do that, the new host asks you to change domain nameservers.
I suggest you change domain nameservers at the last stage so that, the downtime of your website will be reduced impressively.
Now, your new hosting setup process is completed. You can set up the database, add files, and change various settings.
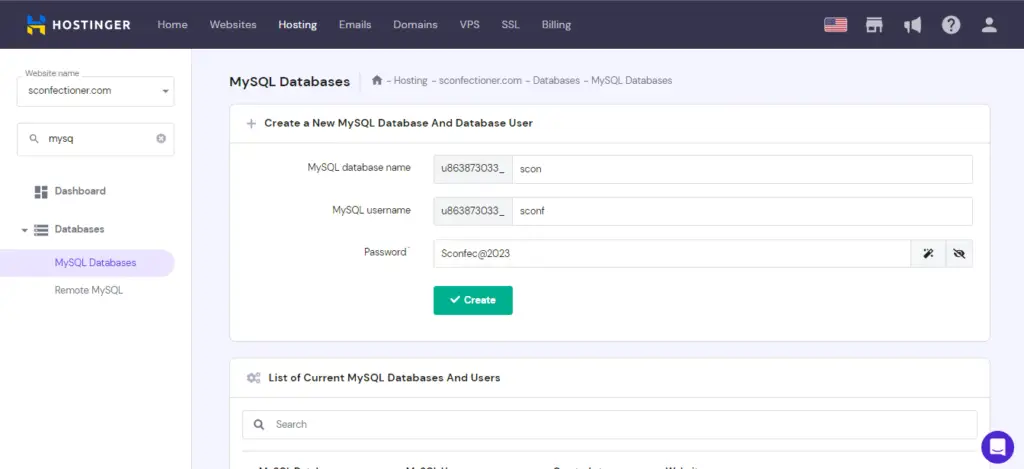
The next process in Step 2 is to create a new database user. For that, you need to access the website management area, and create a new database by selecting MySQL. Here, you need to create a new database, its user, and its password. Keep these details safe as we require them later.
In this way, Step 2 completes by adding your website on new host, and setting up a new database.
Step 3: Transfer Files, and Database to the new host.
Step 3 requires transferring database, and website files we downloaded earlier. First, we will import our database!
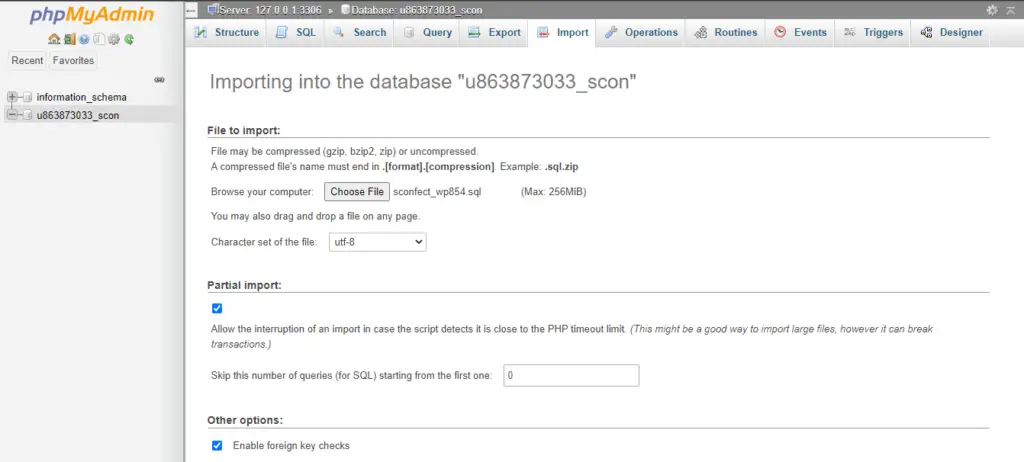
Access phpMyAdmin of the new host, and select the new database we created in Step 2. There you will import the database of your website. Just access the Import tab, and select the previously downloaded database file. After that, click ‘Go’ without changing anything. After some moment, your database will be imported successfully.
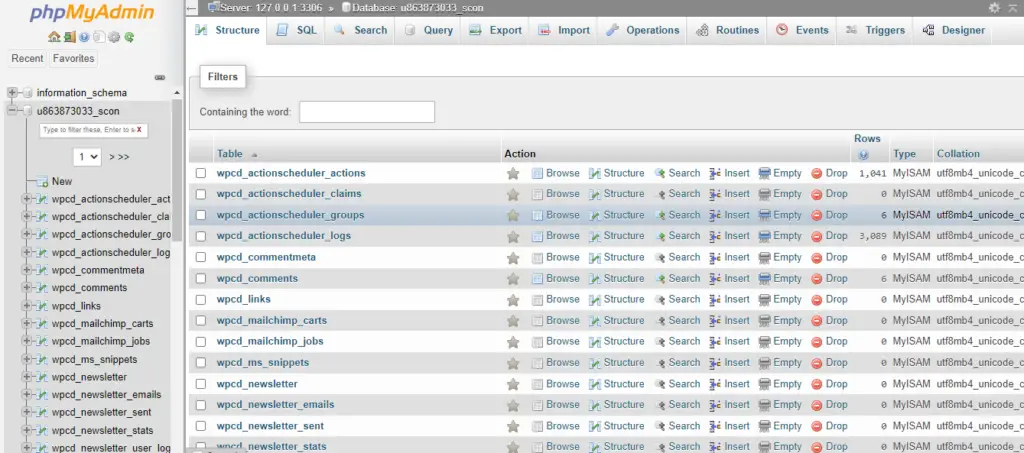
Once the database is fully imported, you can now transfer website files. To do that, you need to access File Manager on the new host, and upload the zip file you downloaded in Step 1. And again, it will take time if your file size is heavy.
After the zip file is uploaded completely, you can now extract files by using the ‘Unarchive’ option. Hostinger features its own panel known as ‘hpanel’. If you’re using other hosts, you may find Cpanel but the process is the same.
As the files are extracted, you can delete the zip file. Now, it is time to set up a database for the new host. For that, access the wp-config file, and find the database section. You need to change the database name, user, and password according to the new database created in Step 2. Replace all information, and save it.
Once it is done, we are ready for the final step which is to change the domain nameservers.
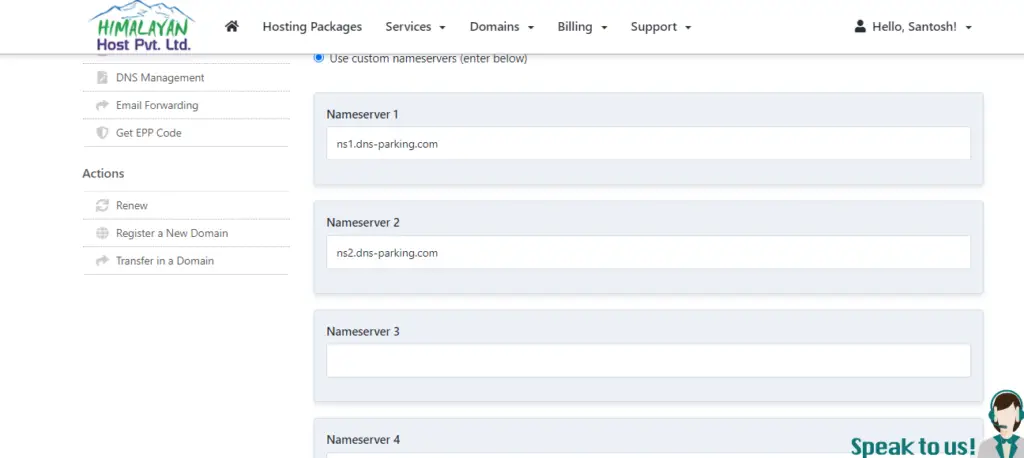
Step 4: Change Domain Nameservers to the new host.
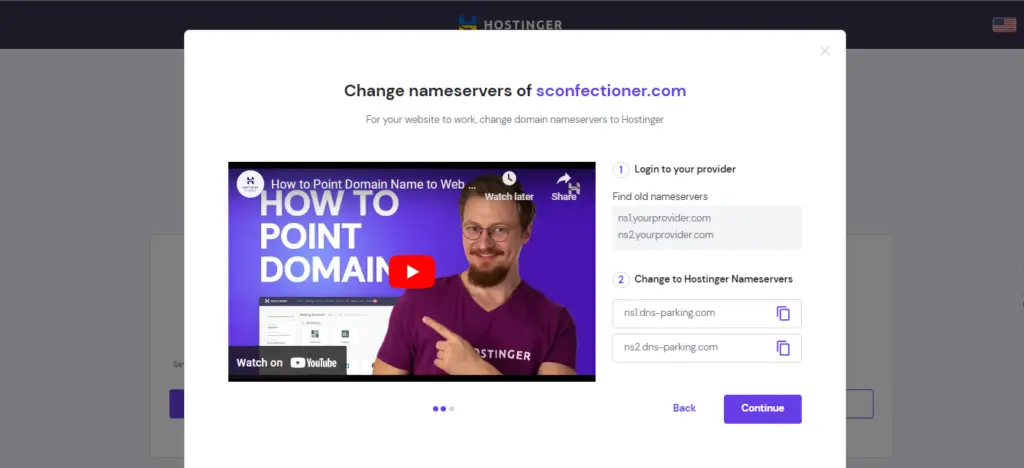
The domain nameservers can be found on the host where you’ve purchased your hosting. In my case, my domain is purchased with Himalayan Host so, I will access the domain there, and change the nameservers to Hostinger.
Once I update the domain nameservers, it may take up to 24 hours for full propagation. But don’t worry, it happens quickly most of the time.
For a more detailed step-by-step tutorial, you can watch our YouTube video.
Conclusion
With these 4 easy steps, we migrated our website from one host to another easily. If you have a WordPress website with a file size of less than 1GB, you can use free plugins like UpdraftPlus, and All-in-One WP Migration for hassle-free migration.
Learn How to migrate WordPress website using UpdraftPlus Plugin.
However, for larger WordPress websites, and websites other than WordPress, you can use the steps discussed above for perfect migration.
If you have any queries or doubts, you can comment below, or contact us via email.