

Do you know WordPress websites are vulnerable to security threats?
Over 450 million websites around the world are using WordPress platforms that include blogs, e-commerce sites, personal websites and others.
WordPress users are increasing day by day due to which there are possibilities for various fraudulent acts by hackers, black hat SEO practitioners and other unethical people.
As a WordPress website owner, you need to secure your WordPress site from any possible attacks that may include bot traffic, hacking, negative SEO ranking and much more.
So, how can you secure your WordPress website? Let’s find out in this informative article.
There are various strategies you can implement to secure your WordPress website. We will be dealing with some important plugins and technology that you can implement on your site.
Table of Contents
Tips to secure your WordPress site
Using Jetpack Plugin
Jetpack is one of the trusted and widely used WordPress plugins that keep close monitoring of your website.
There are various awesome features available in this plugin for free and if you go with the paid version, you get more features.
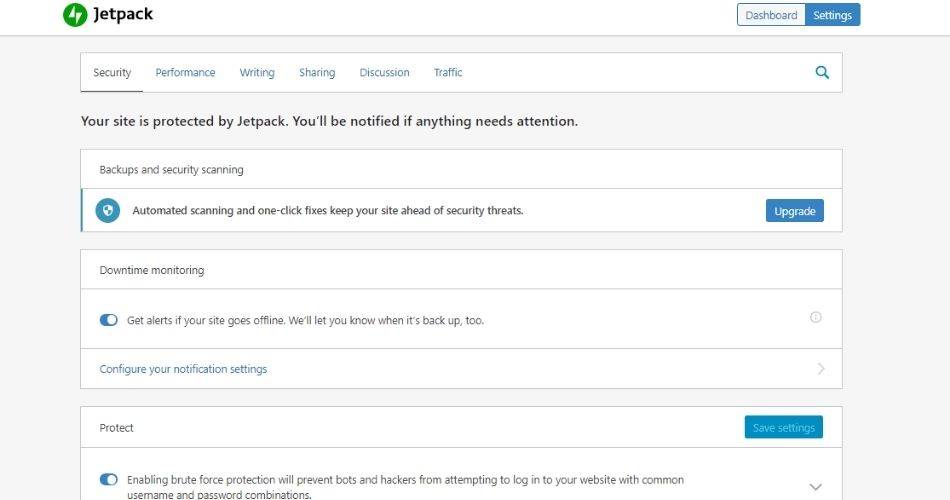
Talking about the security features in the free version, you can access the site protection option that blocks unwanted traffic and bot visitors to your site. Besides, Jetpack also monitors spam activities and notifies you if any bad events happen.
One of the awesome features provided by the Jetpack is the 24/7 monitor of the website. If your website goes down, the system automatically notifies you via email so that, you can analyze issues.
The plugin offers features like site accelerator, lazy loading images, downtime monitoring, brute force protection, which are essential for your site to perform well on search engines.
In addition, you can monitor your site performance and traffic from the Jetpack dashboard. The dashboard shows the daily number of visitors, traffic source, link clicks and various other statistics to find out the authenticity of your website traffic.
How to set up Jetpack?
Setting up the Jetpack plugin is simple as it is.
- First of all, go to the Add New Plugin section and install Jetpack.
- Activate the plugin and set up your account as instructed.
- After successful setup, you will find the ‘Settings’ tab where you can use features like site accelerator, lazy loading, and website offline/online notification.
- You can view your website statistics and performance under the ‘Detailed Stats’ tab.
WPS Hide Login
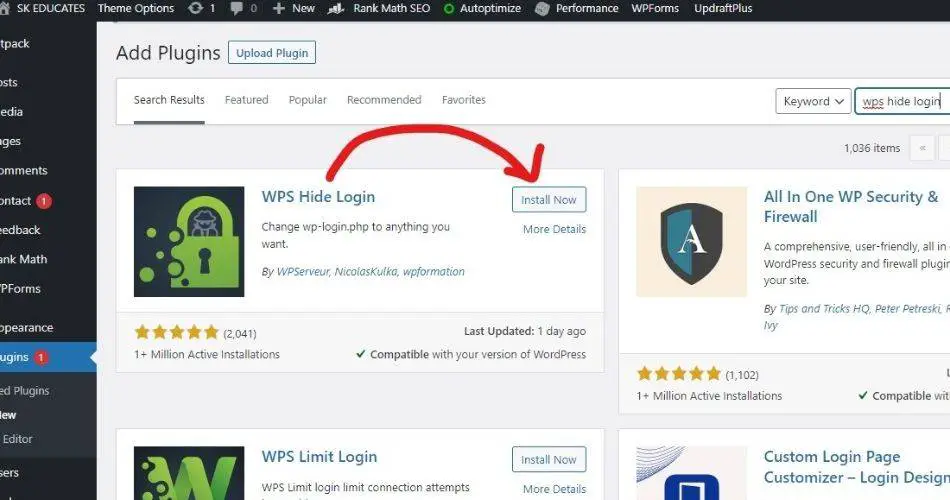
WPS Hide Login is another vital plugin that you can implement to secure your WordPress site.
This plugin allows you to customize your wp-admin page and you can do this to make your site’s login difficult for hackers.
For example, the majority of WordPress users keep the admin page URL to the default settings that means anyone can find your login page via https://yoursite.com/wp-admin. With that, the chances of breaching your WordPress site is higher and the hacker can easily do that.
To protect it, you can use the WPS Hide Login plugin and customize your admin login URL.
How to set up WPS Hide Login?
First of all, install the WPS Hide Login plugin from the plugin area and activate it.
After successful activation, you need to go to the settings tab.
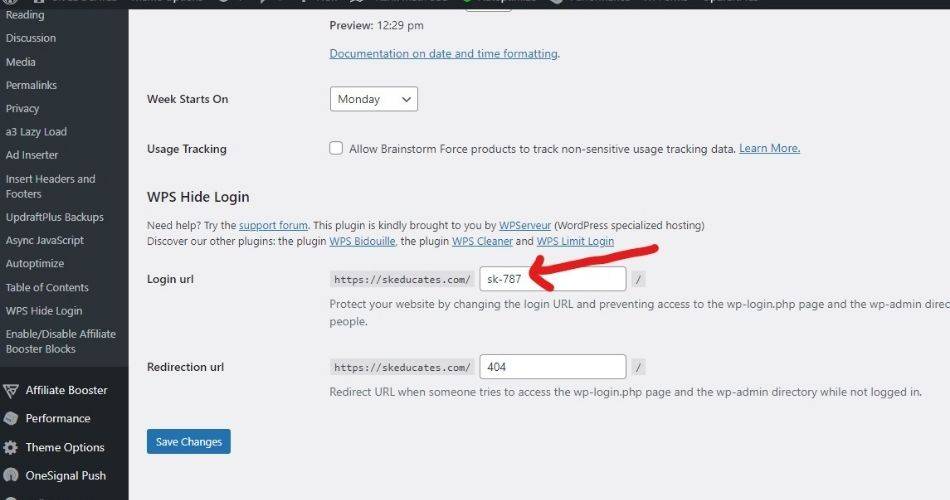
In the settings, you can customize your login page. You can keep anything like https://yoursite.com/797-YS787. With this customization, other people can’t easily locate your admin URL. Unless you share this URL with others, you only can access your site login page.
Cloudflare Integration
Using Cloudflare is the most important strategy to secure your WordPress site from DDoS attacks. Websites these days are easily breached by bot traffic and the consequences are devastating to the site owners.
You can get protected from bot traffic and other web attacks by using the Cloudflare technology for free.
Cloudflare is one of the intelligent technologies that keep your site secure by blocking bot traffic, DDoS attacks and preventing fraudulent activities.
How to set up Cloudflare integration?
- First of all, you need to create a free account on Cloudflare using your email account.
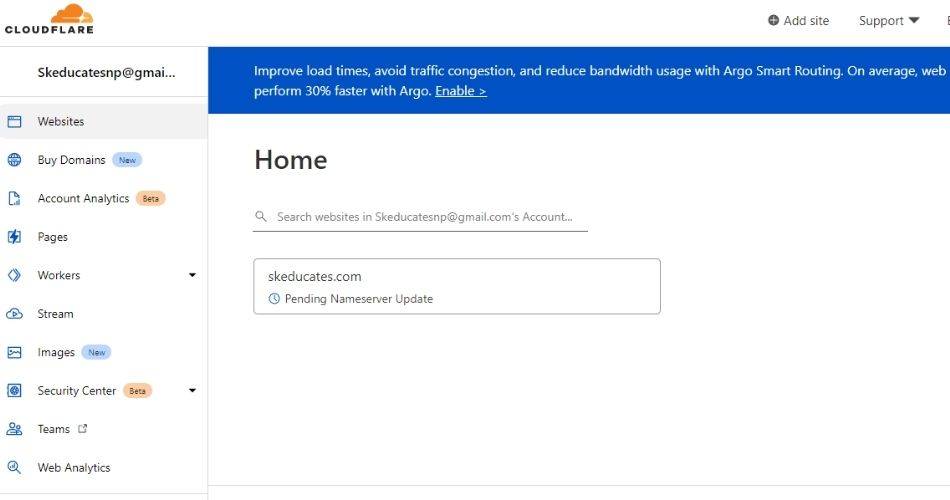
- After account creation, you are required to add your website on the Cloudflare platform.
- After adding the website, Cloudflare will scan your existing DNS settings and ask you to change your current domain nameservers to the Cloudflare nameservers.
- You must change your nameservers at your host to the nameservers provided by Cloudflare.
- After some time, the change in nameservers will be verified by the Cloudflare platform which makes sure your site is protected.
- Cloudflare will recommend some settings like SSL configuration, caching etc. which you can implement.
- When all settings are implemented, your site is fully protected by the Cloudflare platform.
Conclusion
If you implement the strategies discussed above, you can secure your WordPress site from online threats.
Despite implementing all the protection strategies, there are still chances for security threats. Having said that, you can’t neglect to apply such strategies to mitigate bad events.
It is better if you use all the trusted plugins and technologies to keep your site secure.
There are other plugins like WordFence which can protect your site from unwanted activities. You can research on the internet and use various other techniques.
Cloudflare Integration, WPS Hide Login and Jetpack are the top methods you can use for free so, I have included these things in this article.